A newletter from Terrior Seeds https://underwoodgardens.com/h...
The Best Heirloom Tomato Growing Tips
Heirloom Tomato Growing Tips
in Gardening Advice /by Stephen Scott
The yearly gardening season is just about on us and for many gardeners that means a heavy focus on tomatoes. Specifically, heirloom tomatoes, as their meteoric rise in popularity over the past few years would have many a pop and rock star green with jealous envy. The heirloom tomato seems to be almost everywhere these days, from high end cooking shows with their ultra-close-ups and glamor shots to many new cookbooks focusing on home-grown and locally sourced produce to Farmer's markets, CSA's and almost everyone's home garden. Even die hard hybrid "Better Boy" and "Early Girl" gardeners that have planted nothing else for years are giving these wondrous beauties a shot.
With all of this attention being paid to the "Love Apple" as it was known in Colonial times, we wanted to give you a better chance of harvesting all of that potentially rich, complex, juicy tomatoey goodness that are only seedlings at this point.
Tomatoes are complex creatures, needing rich and well mineralized soil that is well drained and not over-watered. The simple, ruinous yet well intentioned act of giving tomatoes too much water most likely accounts for fully 75% of all of the problems with them; from soil borne fungi and other micro-organisms attacking the roots to fruit splitting, cracking and blossom end rot and ultimately the worst- flavor wash-out. Ideally, tomatoes like a lightly moist soil. The best way to judge when to water is by getting to know your plants and paying attention to the leaves. When the leaves just start to curl at the very edges or tips is when the plant is telling you it's thirsty. Different varieties of tomatoes will have naturally curling leaves, thus the need to get to know your specific plants. Give them a drink, but don't drown them. There has been multiple studies done that have clearly shown that tomatoes do much better with a little less water than a little more. Production, taste and disease resistance all increase when the plant is watered a full 25% less than what is commonly believed to be the "right" amount.
Now that we have the biggest issue out of the way, let's look at some other techniques to get the best out of this year's tomatoes! This is not an exhaustive, encyclopedic resource. There are many, many books available that are devoted entirely to the subject of fixing your tomatoes. What we want to do is give you some good, proven and easily used tools to help you get the best out of your tomatoes this year. Some of the most effective remedies are the simple and easily applied ones, as they are the ones that get used more often. So here we go!
-If you see brown or black soft spots appearing at the blossom end (opposite the stem) of the tomatoes, you have blossom end rot. This is caused by a lack of available calcium and can be easily corrected. Tuck a Tums or other antacid tablet or two into the base of the roots and give them a little water to soften. The antacids are calcium carbonate and will quickly provide needed calcium to the plant. It won't cure the existing blossom end rot- nothing can- but will prevent the next set of blossoms from having then same problems.
-A 10 – 20% milk solution used as a foliar spray is highly effective against mildews and tomato mosaic virus. This remedy was discovered by Wagner Bettiol, an agronomist from Brazil found that weekly sprays of a milk solution was faster and more effective than synthetic chemical fungicides. The milk solution controlled the fungi just as well, with the added benefit that it acted as a foliar fertilizer and boosted the plant's immune system and production. This spray also works for zucchini, cucumbers and other cucurbits including melons. It seems to work on roses also!
1 Cup milk
9 Cups water
Mix well and spray on offending mildews, blights and assorted unwanted fungi.
-The baking soda/mineral oil approach has been around a long time and is familiar to long-time gardeners, but it bears sharing. Cornell University has research showing the effectiveness of this approach. The baking soda deters fungus spores, and the oil coats the leaves, holding the baking soda in place longer.
1 Tbs Canola or mineral oil
1 Tsp baking soda
1 Gal water
Mix well and spray directly on the fungal blights.
– To stop nematodes from attacking the roots of your tomato, insert old 1 to 5 gallon nursery pots that have been cleaned, disinfected and had the bottoms cut out into the soil leaving 2-3 inches showing. Transplant your tomatoes into these guards. For heirloom tomatoes, the larger the pots the better, as the root system can be extensive.
-Another preventative measure for blight and other diseases, sprinkle a handful of this mix into the planting hole before you insert the transplant.
3 Cups well aged compost or potting soil
1/2 Cup powdered milk
1/2 Cup Epsom salts
1 Tbs baking soda
Mix well and sprinkle a handful into each planting hole.
-For soft-bodied insects, the milk spray described above is very effective, as well as a simple home-made insecticidal soap spray. You must use soap and not a detergent. They are different in how they work. Soap will kill the bugs, detergent will often kill the bugs and your plants! You've been warned. One of the absolute best soaps out there is Dr. Bronner's. You can get it in a liquid form, it is certified organic and won't harm your plants.
1 Tsp liquid soap
1 Qt water
Mix well and spray on the unwanted critters.
-When the plants are really working setting flowers and fruit, use the Spring Garden Soil Elixir recipe and omit the Borax and cranberry juice. Mix as usual and give a light spray to the roots as a side dressing to give the tomatoes a boost in nutrients to keep the health and flavor up.
These techniques and tips will set you on the path of better, tastier and longer producing tomatoes this season. If you have an especially effective remedy or recipe that you've used to help your tomatoes do well, please share it with us!
~~~~~~~~~~~~~~~~~~~~~~~~~~~~~~~~~~~~~~~~~~~~~~~~~~~~~~~~~~~~~~~~~~~~~~~~~~~~~~~~~~~~~~~~~~~~~~~~~~~~~~~~~~~~~~~~~~~~~~~~~~~~~~~~~~~~~~~~
https://underwoodgardens.com/g...
Growing Peppers 101
in Gardening Advice /by Stephen Scott
The More You Know – the Better You Grow
Growing peppers seems to come naturally for some gardeners, while others always seem to struggle. Sometimes this stems from easily-avoided mistakes or accepting certain myths or misinformation as correct.
Today we're looking at the basics of growing peppers in your home garden and some mistakes and myths to be aware of and avoid. You might look at this as a how-not-to guide because occasionally it's just easier showing what not to do than describing and explaining the right way. Plus, seeing other's mistakes sometimes sinks in faster.
These are our observations from our 20+ years of gardening combined with the past 10 years of gardening questions we've answered.
Conditions
The initial conditions you choose are critical to sprouting, transplanting and growing success, no matter what seed you are planting. Here are some things to consider as you grow your peppers this season.
Starting Seeds
•Pepper seed germination – even under optimum conditions – is often slow and erratic. Don't compare your tomato seed germination with peppers and think they aren't performing as they should.
•Tomatoes can sprout in 3 – 5 days in ideal conditions, while peppers might take 14 to 21 days. This is normal, be patient, and don't worry!
•The two most common problems in pepper seed germination for home gardeners is soil that is too cool and not moist enough.
•Use any readily available thermometer that will accurately read in the 60° to 100°F range and insert it an inch into the soil. If it's 80° or above, you should have good success. Soil temperature below 75° can delay seed germination by 3 weeks or more! •An easy way to determine soil moisture is by touching the surface of the soil with your finger – it should be damp to slightly wet where you touched the soil, and you can feel the moisture when you rub your fingers together. If not, it's a little too dry.
•A good rule of thumb for germinating pepper seeds is warm, moist soil – meaning 80° – 90°F – watered from above with warm water.
•This will consistently give you better germination on all pepper seeds – sweet or hot. Maintain the soil temperature with heat mats or placing the seedling flats in a consistently warm area such as on top of a freezer or refrigerator. Warm water from above minimizes the cooling effect on the soil as opposed to bottom watering during sprouting. Once the seedlings have sprouted, switch to bottom watering to minimize mold and fungus issues.
Transplanting
•Young seedlings need to be conditioned or prepared for the outside garden environment, or they will suffer greatly or die. Seedlings are tender with soft tissues, sensitive leaves, and small root systems. They aren't ready to be plopped into the early spring garden without hardening off, sort of like a boot camp or physical conditioning program. This usually takes about 2 weeks of setting the seedlings outside for short periods and going longer as they toughen up.
•The ideal transplanting day is warm soil with cloud cover and little to no breeze. Seedlings need warm and moist soil, much like they have before transplanting. Give them a drink of water immediately after transplanting to help avoid shock.
•The biggest issues with transplanting are soil that is too cold, too dry (or too wet) or the seedlings are still too tender and need more hardening off. It's better to wait a few days to a week than jump the gun, transplant too early and lose your hard work.
•Peppers like to be close, but not too close. 18 inch spacing between plants is a good start – smaller plants can be planted a foot apart, while larger ones will need 18-24 inches. You want the plants to grow a good leaf canopy that shades the fruit from sunscald while not competing with each other and becoming leggy or spindly.
Growing
•To keep your sweet peppers sweet, don't plant them close to your hot ones; they will readily cross-pollinate and you'll have extremely hot sweet peppers! We learned this one summer when we had Jalapenos upwind of our bell peppers. The unexpected bite of a fiery bell shocked us; we later taste-tested and found the bell peppers were hotter than the Jalapenos.
•Giving your peppers some space is the best solution – distance minimizes the chance of hot pepper pollen finding your sweet pepper's flower, either by wind or pollinators. Seed growers isolate peppers by 1,500 feet, but if we've found planting sweets 50 feet or more upwind of the prevailing breeze is pretty dependable. Peppers also grow well in containers or large pots, so you can grow them well away from the garden if needed.
•Peppers produce best with moderate temperatures, although they can tolerate warmer days if it cools off at night.
•Much like tomatoes, the key to getting big harvests is night-time temperatures. Peppers set the most flowers – thus the most fruit – between 65° and 80°F at night. Above about 86°F the blossoms drop off, costing you precious peppers. High winds, lack of pollinators and excessive nitrogen – such as with synthetic fertilizers – also cause blossom drop.
•Sustained daytime temperatures above 95°F causes the pollen to become sterile with lower harvests. Shading the peppers also reduces sunscald and the loss of immature pods from heat stress. Sunscald happens when leaves don't protect ripening peppers from the sun and they get a sunburned appearance.
•Pod drop happens when immature pepper pods drop off the plant, most often caused by high heat combined with water stress or excessive nitrogen fertilizer. Shade cloth reduces the heat, and a drip system on a timer moderates the moisture and avoids large swings that stress the plant, causing it to shed pepper pods. Consistent moisture is best for healthy growth – not just with peppers – and avoids the soil getting too dry between waterings.
•A good layer of straw mulch also maintains soil moisture levels between watering. We've found mulch reduces the amount of time our drip system is on, by cutting down the amount of water that is lost to evaporation.
•Peppers, along with most vegetables, like rich, well-balanced, and fertile soil to grow in. Too much of any one thing can be detrimental, and too much nitrogen leads to exuberant leaf and flower growth with little to no fruit set – most often seen in peppers and tomatoes. There aren't enough other nutrients to support the fruit growth from all of those flowers.
•Rotating beds where you grow peppers every year helps prevent many diseases and over-wintered bugs from attacking. Good soil fertility is the best prevention.
•Blossom end rot in peppers is much the same as in tomatoes, caused mainly by a lack of available calcium in the plant as it starts setting fruit – often large amounts of fruit at the same time. It can also be caused by large fluctuations in soil moisture, such as forgetting to water or a rain after it's gotten dry. The usual suspect – excess nitrogen – also plays a part here.
•Feeding the plants with a 20% solution of milk – 2 cups of milk in 8 cups of water – with a teaspoon of molasses gives the plants a boost in calcium and much-needed sugars for fruit production. Give each plant a cup of the solution once a week until the new fruit starts setting, then twice a month during heavy production.
Harvesting and Handling
•Almost all peppers go through several colors before ripening to maturity – both in color and flavor. The green stage is usually the least flavorful and sweet, but sometimes the spiciest and a bit bitter. As it ripens through yellow, orange and into red, the flavors become richer and deeper, with the sweetness developing and the heat mellowing. Try picking your peppers at all of the stages to see what you like best!
•A good rule of thumb for picking is if the pepper is easily removed from the stem, it's ready. If you have to pull or tug on the pod, it's still too early.
•This changes, of course, if you are harvesting continuously to increase the harvest – you'll be removing slightly young peppers. In this case, it's best to cut the peppers off the stem to avoid damaging the plant by pulling, as the stem will usually break before the stem does.
•Capsaicin – the "heat" in peppers – is located on the ribs and seeds. If you look closely, you'll see tiny yellow dots on the ribs – this is the pure form and is concentrated. If you prick one of these dots, you'll feel it's effects – sneezing, runny nose and itchy, watery eyes. Avoid touching it with bare skin to prevent spreading it to your face, eyes, etc.
•Some otherwise sweet peppers have a hot streak on the ribs and seeds, so now you know how to handle them.
•Some people are simply extremely sensitive, no matter how mild!
Myths
One of the biggest myths we've seen is the one that the different number of lobes on a bell pepper determines it's sex – such as "3 lobes means it's female and sweeter, 4 lobes is male and hotter"…
•First – peppers, like tomatoes, are "perfect" flowers, meaning they have both male and female organs in the same flower and can self-pollinate.
•Second off – and this is common sense – if this was true, you would need to buy "male" and "female" pepper seeds for reproduction, right? After all, if 3 lobes are "female" and 4 lobes are "male", it stands to reason they would produce the same sex seeds, thus the need for male and female seeds to be planted close to each other.
•So, where have you seen "male" or "female" pepper seeds for sale? Or maybe we should capture that market share?
Another myth is that all red peppers are hot, while green peppers are sweet.
•This most likely arises from people only seeing green bell peppers in the supermarket, and not realizing that they ripen into different shades of yellow, orange, or red and are still sweet.
•The fallacy is easily seen with both bell peppers and Jalapeños are both green on store shelves!
~~~~~~~~~~~~~~~~~~~~~~~~~~~~~~~~~~~~~~~~~~~~~~~~~~~~~~~~~~~~~~~~~~~~~~~~~~~~~~~~~~~~~~~~~~~~~~~~~~~~~~~~~~~~~~~`
Lettuce info from Bountiful Gardens
1) Choose bolt-resistant varieties. To simplify that, we have a Summer Salad Collection and a Bolt-Resistant Mix
2)Put the seed in a dry, closed jar in the refrigerator for a few days. Most lettuce varieties do not like to sprout if the seeds have been at temperatures above 85 degrees. The refrigerator makes them think that they have been through the winter. They think it's spring when you take them out, and sprout readily.
3)Choose a spot with shade during the hottest time of day--11 AM to 4 or 5 PM. Other crops can make shade--a trellis of beans, for example. Or plant on the east side of your house. Or use Shade cloth. If you don't have a piece of ground that will work for you, use containers and keep them in a semi-shaded place. You can plant them in the garden later in the fall.
4)Plant in succession, a few every week or two rather than all at once.
5)Plant in the evening and water well.
Herb of the Month: Estafiate (Spanish)
Rob Hawley/courtesy photo
Estafiate, also known as prairie sage, is an excellent bitter tonic.
Posted Thursday, February 14, 2019 3:19 pm
By Rob Hawley
For The Taos News
Names: Sacred Sage, South Dakota Sage, man sage, Silver wormwood, Prairie sage. Family: Asteraceae. Genus and species: Artemisia ludoviciana.
Estafiate is common throughout the continental United States and Canada and is a member of the same plant family as sunflowers and dandelions (Asteraceae) although it has very small inconspicuous flowers and somewhat fuzzy gray-white leaves and stems. Plants of this genus (Artemisia) are often mistakenly referred to as "sages," but members of the genus are not actually sage; they just look gray and fuzzy like true sage, which is in the family of Laminaceae and the genus of Salvia.
At this point, the name "sage" is so commonly given to many plants in this genus that almost everyone uses it to describe this plant. Native people of the American plains know it as sacred sage, and it is an important plant used in many ceremonies.
Like most of the Artemisia genus, estafiate is intensely bitter, which makes it an excellent bitter tonic. Bitter herbs stimulate the digestive system by improving appetite, increasing the production of digestive enzymes and bile and strengthening the muscular response of the intestine called peristalsis. Bitters are used around the world for tummy aches and indigestion; in fact, you will find a bottle of herbal bitters on the tables of many European restaurants.
Like its cousin Chamiso (Artemisia tridentata), estafiate is rich in aromatic volatile compounds that increase the secretion of moisture in the lungs to effectively address thick mucus in lung infections. Thick mucus makes coughing difficult and increases the risk of bacterial infections. The volatile oils in estafiate also alleviate menstrual cramping and stimulate a tardy menstrual period. Estafiate contains artemisin and santonin, which irritate and cause small intestinal parasitic worms such as pinworms and other roundworms to be expelled.
Collect estafiate by cutting with a scissors or pinching the plant near the base and leaving a pair of healthy leaves so the plant can continue to support the root system. Bundle them with a rubber band. Allow them to hang and dry in a cool shady place with good airflow. When dry, use one teaspoon of the leaves per cup of water and steep for 15 minutes.
For digestion, slowly sip one ounce 15 minutes before meals.
For a cough, drink three to five cups a day.
For menstrual cramps or a tardy period, drink two cups a day.
Consult your health care practitioner about the use of herbs or supplements, especially if you are pregnant, taking prescription medication or administering herbs to children.
Rob Hawley is co-owner of Taos Herb Company. Find out more information at (575) 758-1991 or taosherb.com.
~~~~~~~~~~~~~~~~~~~~~~~~~~~~~~~~~~~~~~~~~~~~~~~~~~~~~~~~~~~~~~~~~~~~~~~~~~~~~~~~~~~~~~~~~~~~
Epazote nutrition facts
Epazote is a traditional Central American herb employed by native Mexicans since antiquity. Its strong, musky flavor gives a unique taste to Mexican and other Latin American cuisines. While its young shoots and tender leaves used like leafy greens in soups; its mature, pungent leaves added in small quantities as digestive and carminatives in bean, fish, and corn dishes.
Binomially, the herb belongs to the large Amaranthaceae family of herbs and vegetables, including amaranth, spinach, quinoa, beets, etc. Scientific name: Chenopodium ambrosioides. Some of the common names include wormseed, Mexican tea, pazote, etc.
Epazote (Chenopodium ambrosioides). Note for serrated, pointed green leaves. Courtesy: jonny.hunter
Epazote is one of efficiently growing annual herb. It prefers well-draining, sandy soil and full sunlight to flourish. The herb grows generously in the fields, on the roadsides as a weedy invasive plant. It reaches about 60 to 100 cm in height featuring small pointed leaves with serrated margins. Tiny yellow-green flowers appear in clusters as in amaranth which develop subsequently into numerous small black seeds.
Health benefits of Epazote
Epazote has largely been viewed as a medicinal herb rather than a culinary plant. In general, its leaves used in the cooking to counter indigestion and flatulence effects of beans, high-fiber and protein food. Nonetheless, the herb has its own intrinsic phytonutrients which when consumed optimally would contribute towards overall wellness.
The herb is very low in calories. 100 grams of leaves carry just contain 32 calories. Its smooth leaves provide a good amount of fiber, 3.8 g per 100g.
Its leaves compose of many monoterpene compounds such as ascaridole (60-80%), iso-ascaridole, p-cymene, limonene, and terpinene. Ascaridole is toxic to several intestinal worms like roundworm, hookworms, pinworm, etc. Native Mayans drank its infusion regularly to keep off from worm infestation.
The herb parts, especially young leaves are an excellent source of folic acid, provide 215 µg or 54% of daily recommended values. Folic acid is involved in the DNA synthesis and cell division. Caution note: Expectant mothers, however, should avoid epazote greens in their diet since it causes uterine cramps and possible risk of termination of pregnancy. (Medical disclaimer).
Epazote has small amounts of vitamin-A and some flavonoid phenolic anti-oxidants such as beta-carotenes. Together, they act as protective scavengers against oxygen-derived free radicals and reactive oxygen species (ROS) that play a role in aging and various disease processes.
The herb has a good amount of minerals like calcium (27% of RDA), manganese, potassium, iron, copper, zinc, and selenium. The body uses manganese as a co-factor for the antioxidant enzyme, superoxide dismutase.
It has small but adequate levels of other B-complex vitamins, particularly pyridoxine and riboflavin. These vitamins function as co-factors in the enzymatic metabolism inside the body.
See the table below for in depth analysis of nutrients:
Epazote herb (Chenopodium ambrosiodes), fresh leaves, Nutritive value per 100 g.
(Source: USDA National Nutrient data base)
Principle
Nutrient Value
Percentage of RDA
Energy
32 Kcal
1.5%
Carbohydrates
7.44 g
6%
Protein
0.33 g
<1%
Total Fat
0.52 g
2%
Cholesterol
0 mg
0%
Ditary fiber
3.8 g
10%
Vitamins
Folates
215 µg
54%
Niacin
0.639 mg
4%
Pantothenic acid
0.179 mg
3.5%
Pyridoxine
0.152 mg
12%
Riboflavin
0.348 mg
27%
Thiamin
0.028 mg
2%
Vitamin A
57 IU
2%
Vitamin C
3.6 mg
6%
Electrolytes
Sodium
80 mg
5%
Potassium
470 mg
10%
Minerals
Calcium
275 mg
27.5%
Copper
0.190 mg
21%
Iron
1.88 mg
24.5%
Magnesium
121 mg
30%
Manganese
3.098 mg
135%
Phosphorus
86 mg
12%
Selenium
0.9 µg
1%
Zinc
1.10 mg
10%
Phytonutrients
Carotene-ß
38 µg
--
Selection and storage
Epazote is available year-round in the stores specializing Latin American herbs. One may also find dried leaves in the spice stores.
While buying the herb, look for fresh, small, young tender leaves as mature leaves can be pungent and strong scented. Avoid large, flower stems with yellow or wilted leaves. Once at home, store unwashed in the refrigerator as other greens, wrapped in a dampen towel.
Preparation and serving methods:
Epazote has a strong pungent flavor with a hint of petroleum and mint smell dominating. Its leaves, fresh or dried, and young shoots are being used as a seasoning in the dishes in Mexican, Chilean and other South American regions.
To prepare, wash the leaves in cold water as in other greens and herbs. Few leaves or 1-2 sprigs are just enough to flavor the whole food. It is mainly added in the traditional black bean recipes to improve digestion.
Here are some cooking tips:
Epazote omelet with pickled ramp.
Photo courtesy: yuco chan
Fresh epazote leaves added to flavor corn-based recipes like gordita (corn dumplings) and bocoles (cornmeal cakes).
The herb is used in traditional Mexican mole sauce with other ingredients like tomato, bell pepper, tomatillo, annatto, etc.
Fresh leaves used in black (Frijoles negros) and pinto bean stews.
Contrary to its name, Epazote herb is not used to make tea but to make an herbal infusion which is later used in the recipes. Traditional Yucatan lime and chicken soups use this decoction.
Quesadillas con Epazote, is a cheese stuffed tortilla which uses the herb as one of the ingredients along with potatoes, mushrooms, egg, etc.
Medicinal uses of epazote herb
Epazote has been found in the traditional medicines in many Central and South American cultures. Its infusion is a popular household remedy for helminthic infestation. Usually, a half-to-one cup of a leaf decoction is given each morning before the meal for three consecutive days as treatment.
The herb is an excellent remedy for stomach and intestinal ailments like indigestion, cramps, and ulcers.
Its decoction has been found to have some anti-diabetic properties. Further, certain trial studies suggest it hold hope for some liver cirrhosis and cancers.
The herb parts should not be included in the nursing and pregnant mothers for its possible toxic effects. (Medical disclaimer).
Safety profile
Important: Epazote herb parts should not be consumed by the nursing and pregnant mothers for its possible toxic effects. (Medical disclaimer).
Epazote (wormseed) should be used in small quantities. Its seed oil rather contains a large concentration of ascaridole and other monoterpenes. When taken internally, these chemicals in the oil may cause extensive damage to liver, kidney, cause rhythm disturbances in the heart and nervous systems. For the same reason, wormseed oil is banned by IFRA (International Fragrance Association) for both external and internal use of its products.
~~~~~~~~~~~~~~~~~~~~~~~~~~~~~~~~~~~~~~~~~~~~~~~~~~~~~~~~~~~~~~~~~~~~~~~~~~~~~~~~~~~~~~~~~~~~~~~~~~
Pepicha Herb Uses – Learn How To Use Pepicha Leaves Pepicha By: Bonnie L. Grant, Certified Urban Agriculturist Printer Friendly Version Image by ottoblotto Pipicha is an herbaceous plant native to Mexico, especially Oaxaca. Cooking with pipicha is a local regional tradition, with the plant an important part of dishes, such as Sopa de Guias, and as an aromatic for fresh fish. The flavor is reportedly quite intense but a few insights into how to use pepicha will have you cooking like a South American pro. About Pepicha Herb Uses Committed cooks are always looking for a new herb or spice. Using pepicha plants will add some serious zing to dishes. Depending upon the region, the herb may be known as pepicha or pipicha. Pipicha has use in many types of recipes. This delicate herb from Mexico mimics the citrus flavor of cilantro but packs much more of a punch. In Oaxaca, the herb is added to arroz blanco, or white rice, which gives the plain starch a nice zing. Modern Mexican cooking is rediscovering this native herb and fancy nouvelle restaurants feature the seasoning in their menus. Pipicha can be difficult to find. Good Mexican food stores or farmer's markets will sometimes carry it. You can most easily find it dried but much of the punch has gone out of the herb. The plant is comprised of wispy stems which become adorned with lovely purple blooms. These develop much like poppy pods, which contain ripe seed. The flavor ingredient is the slender stems and leaves which are chopped before adding to a dish. Be warned when cooking with pipicha! The taste is like cilantro on steroids and a little bit goes a long way. While using pepicha plants in cooking is their main use, there are traditional medicinal applications. It has been used against bacterial infections, liver cleansing and detox. Since it is mainly a culinary herb, most pipicha ideas available are from recipes native to Mexico and South America. In fact, pipicha is also called Bolivian coriander. The flavor is said to be citrusy but with a bit of pine and mint mixed in. It has some of the bite of arugula and can be a bit overwhelming. Mostly, it is the basis of condiments or in sandwiches. It can also be found as a seasoning in soups and stewed meat dishes but is added after cooking as a garnish. How to Use Pepicha Herbs A very fun way to introduce yourself to pipicha uses is by making Garnachas de Calabacitas. These are basically seasoned masa patties fried with a squash, corn, tomato and quinoa filling – very Old World but tasty. The pepicha shows up in just a small amount to season the filling which is garnished with cotija cheese, bean puree and queso fresco. A simpler way to sample the flavor is to delicately decorate a freshly grilled fish with the chopped herb. Other pepicha herb uses are with eggs, braised beef ribs, or rich, creamy frijoles.
Read more at Gardening Know How: Pepicha Herb Uses – Learn How To Use Pepicha Leaves https://www.gardeningknowhow.c...


I haven't gotten around to documenting things via blog but it is time.
My inspiration this growing season was "keepers".
I decided to try a selection of squash. Prior to this I had no experience with Zucchini. I tried two plants. One was Greyzini and the other Cocozelle. Cocozelle outdid the Greyzini but when harvested I found neither one appealed to me. I tried them a few different ways and gave the rest away, tearing up the plants to make room for something I will eat.
Of course zukes are not a keeper so I also planted one each of six different winter squash with moderate success. Thelma Sanders Sweet Potato, Reno, Honey Bear acorn and three different small butternut types. Butter bush, butter baby and 898 experimental. I searched for smaller winter squash plants due to limited gardening space. I also looked for smaller fruit as I am only feeding myself. These should all add to the pantry larder.

Another "keeper" I am trying is the long keeper tomato. I have four different types having started the seeds in early May. As of June 15th they were in their final resting place and this weekend (July 4th), I have first blooms on Reverend Morrows Long Keeper. Our weather has been moderate so I am hoping they will pollinate. Theoretically fruit should develop and be ready to harvest for storage by October. These tomatoes are intended to harvest while green and be stored separately. As they ripen, they should provide fresh tomatoes into the winter months. Reviews indicate that they are not as tasty as summer grown but definitely more palatable than those purchased from the grocery store. I have two different types of Long Keepers as well as a Golden Treasure and a Reverend Morrows Long Keeper.
Although my folks didn't grow a specific tomato plant, they did something similar with unripened tomatoes in the fall. Prior to losing the tomato crop to a hard freeze, they would harvest the green tomatoes. We would wrap them in sheets of newspaper and store them in slatted boxes in the fruit cellar. As needed, my Mom would unwrap and set them on a windowsill to ripen. I recall eating tomatoes through the holiday season which is great in the frozen tundra of Minnesota.
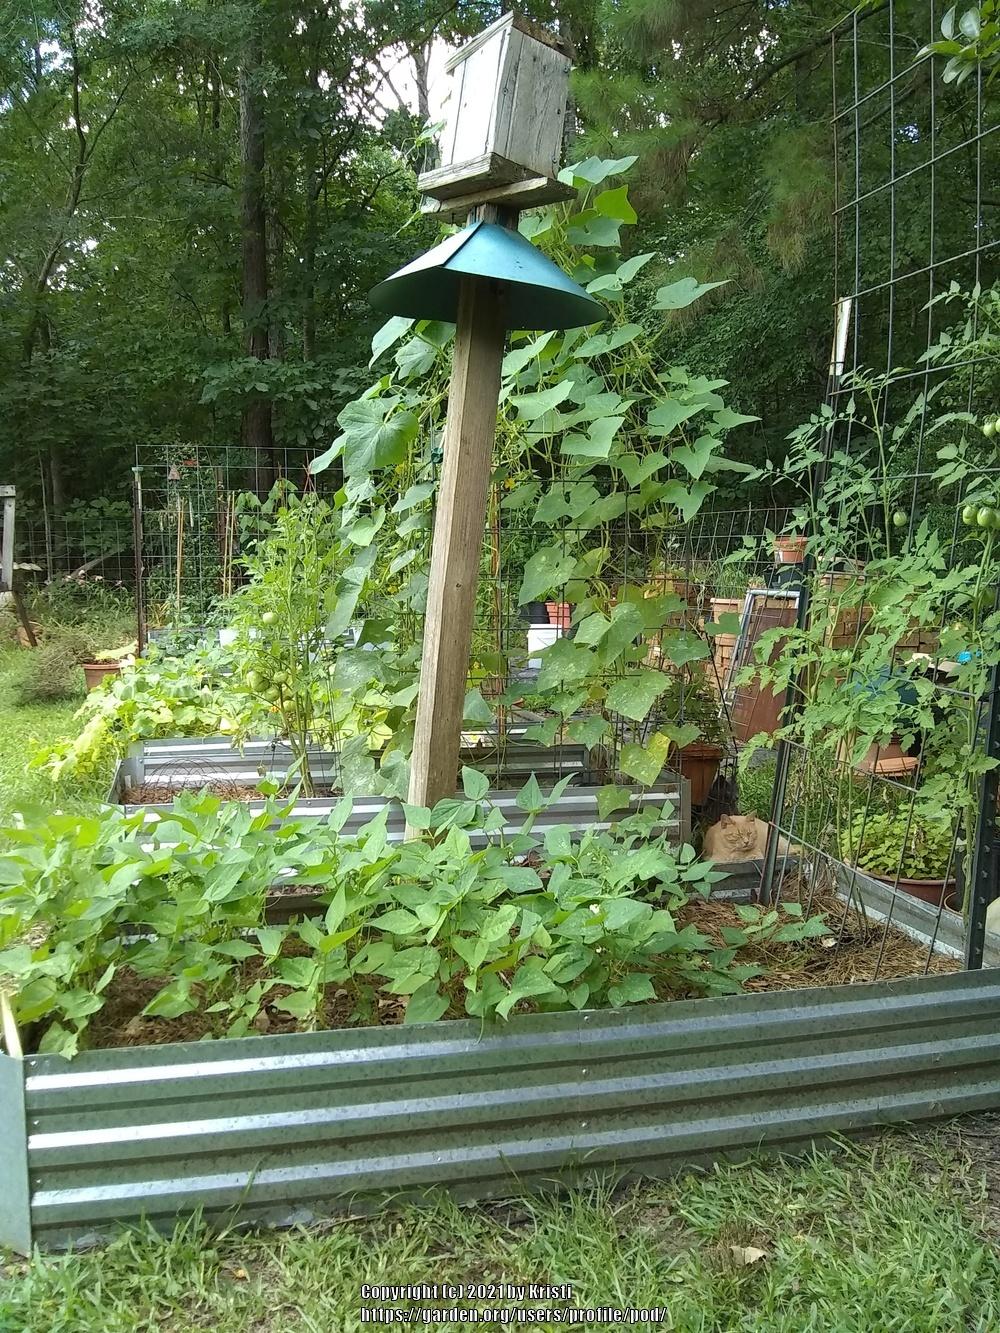
Not a keeper as such but the cucumbers are doing really well. I have eaten them daily, given many away and am up to 16 pint jars of assorted pickles. All this from half a dozen Early Cluster plants. I guess they could be considered a keeper once they are processed in jars. This seed cultivar is definitely a keeper. 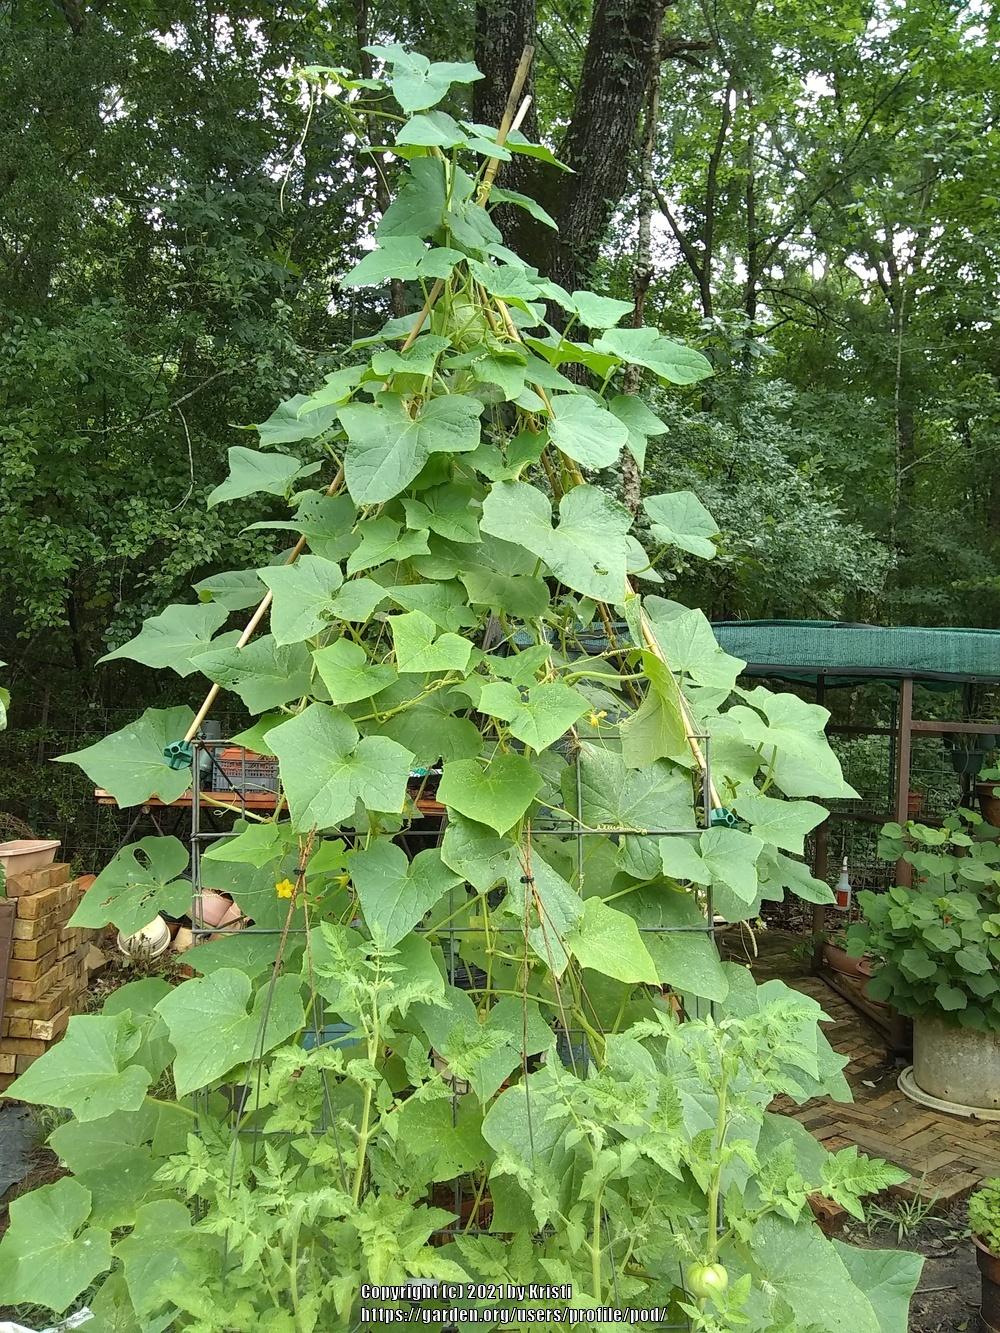
Another keeper of a different type is the okra I have settled on growing. It is Burmese okra. It begins to bloom and produce when the plant is only a foot tall. It continues on although the plant does not grow tall like most okra. I find it well suited for the raised beds and it provides me with an ample amount of okra for the year. I shared these seeds with my okra loving MN sister in law. I can't wait to hear how well they grow in her climate.
I had a couple of sweet potatoes left from last years crop and found they were sprouting. I removed the sprouts placing them in moist soil and have now planted them in a bed. They did well last season and perhaps will deliver a second time. The price is right and the harvested sweeties will store well as a keeper too.
Gardening is always a test drive, sometimes more fun than other times. So with help from above, it is what we make it...
And I thought 2020 was different. 2021 seems to be an equal challenge.
Although I worked less, I worked harder last year.
This year is following suit with less merchandise available.
At the end of November, I tested for covid and passed the test. I stayed home for 2 weeks. Retested negative and returned to work.
Made it thru inventory and soon thru tax time. But once again the best laid plans are on hold.
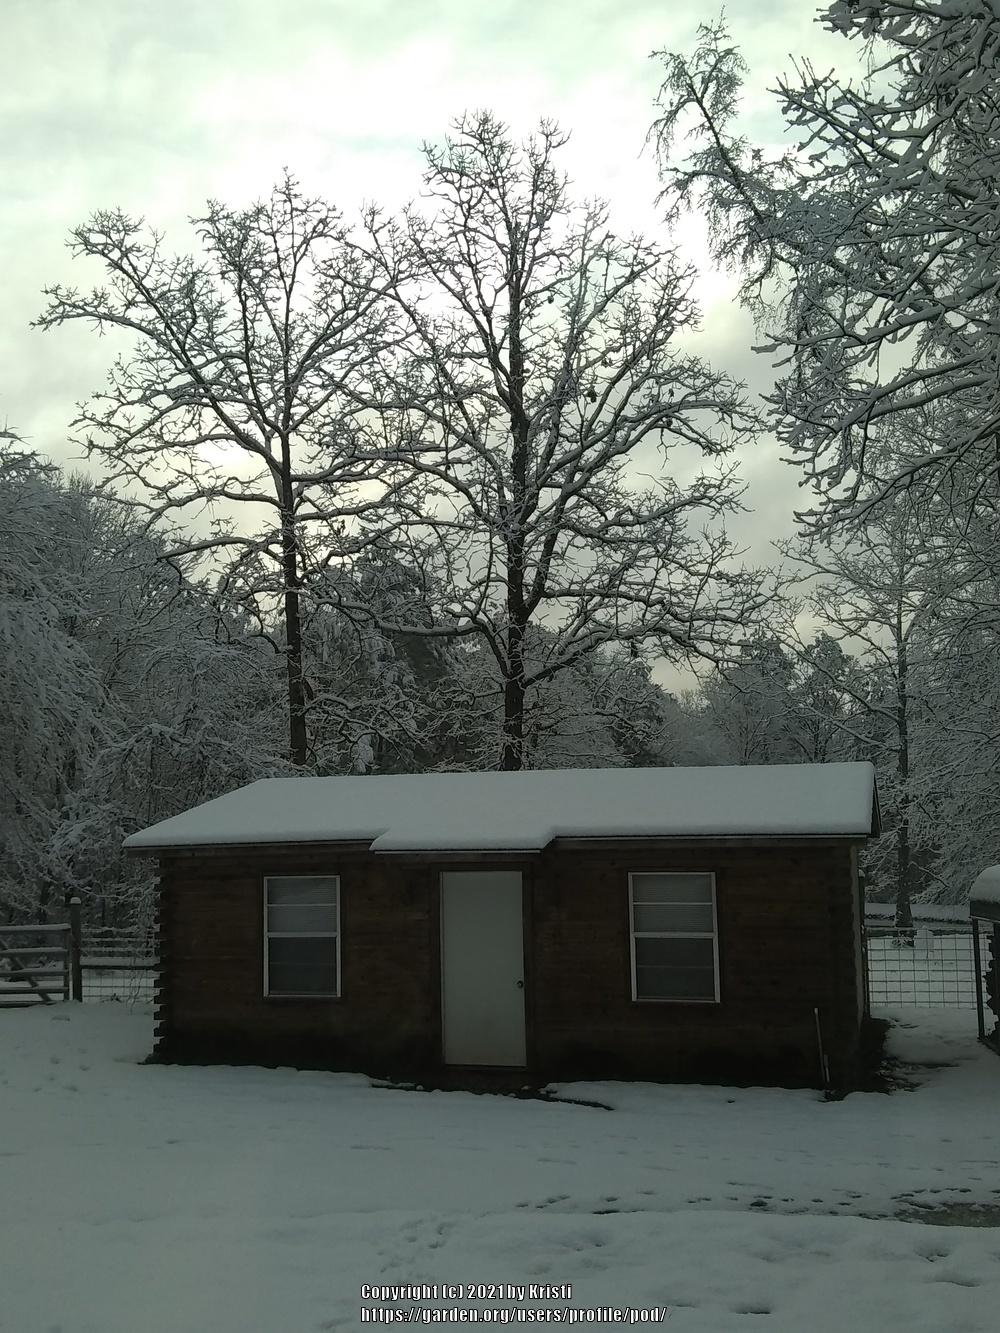
January brought more snow than I recall in this area.


At the end of January, my sweet Annie was diagnosed with a malfunctioning epiglottis. I now know what is causing her problems. On Feb 2nd I realized it was too late. I had to put her to sleep. I am so sad as she was my sweetheart.


Then on Feb 3rd, I was walking Stretch who is vintage as well.  It was dark and I was watching him but not where I was going. Slipped on gravel and broke my leg. Hobbled home, grabbed crutches and drove myself to the hospital. With a temporary cast and new crutches, I came home. Ate dinner late and headed to bed only to get tangled up with the sticky rubber on the crutches. I lost my balance and fell hard on a crutch breaking my hip. Stubborness made me wait till the next day to call EMTs and the rest is history. Both broken bones were operated on, the balance of the month in rehab and now grounded at home. Home health comes to continue therapy but being home is the best therapy of all.
I was saddened to peek into the greenhouse to see that I have lost the majority of my tropical plants. Our cold was down to single digits and stayed below freezing for an extended period of time. This second bout of weather brought more snow (but not enough to insulate) and a 24 hour period of sleet/ice. This wooded area of Texas is prone to limbs and trees damaging power lines. My home was out of power for an extended time. All was well but I sincerely doubt I could have prevented the loss in the greenhouse had I even been home.
Even knowing what to expect, I was in tears and couldn't assess what might have survived. The next day I ventured out for some two sided velcro that I use for tomato vines. I am using it to seal the garbage bag on my leg so I can shower. A shower is one of many blessings to be grateful for. Many folks in this area are still without water over 10 days later.
On this second trip to the greenhouse I noticed a few of the hardier succulents may be all right or revive from the root systems. I will deal with that later. As a believer in things happening for reasons, I will have to ponder the direction this will take me.
In the raised beds that I had planted for winter, I was delighted to harvest lettuce, mizuna, pak choy, radicchio, cilantro, endive leaves. It made for a delightful fresh salad, counted as another blessing. Most of these greens had managed to shake off the ice and snow. 
The mustard will make a come back although the taller leaves were laid low. The Di Cicco broccoli is toast. The growth with the radishes, beets, carrots and peas was slowed but all will take off as well. The bed of garlic and multiplying onions show frost bite but aren't harmed.
I had jumped the gardening gun and planted a small bed of potatoes about a month earlier than normal. They had nice growth on top but the tops were pruned back from the freeze. I have no doubt the potatoes will be fine. Yesterday I saw a pop of green potato foliage coming back to assure me all will be well.
An interesting note on my lettuce, I had two types planted. Little Gem and Parris Island. I find that neither was killed by severe or lengthy freeze, ice or snow but Little Gem had frost bite damage on the perimeter of the leaves. The Parris Island is apparently more cold hardy.
I had started seedlings for tomatoes and of course they are history as well. Perhaps I can get my seeds restarted while I am off from work. The greenhouse will keep till I am in a mood to deal with it.
The thread "Heirloom Garlic ~ single clove" in Plant ID forum
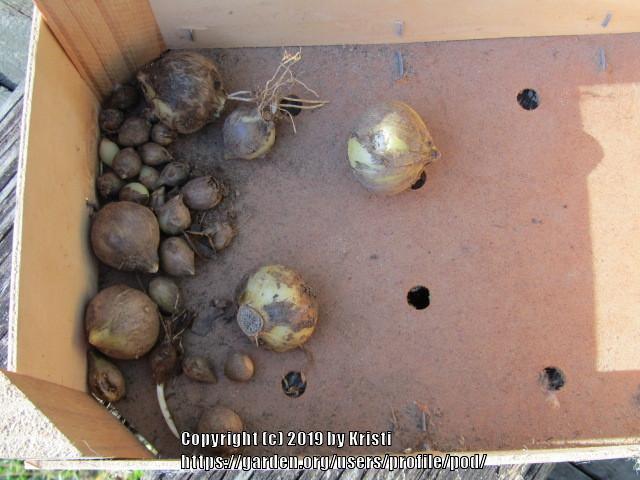
pod said:This start of garlic was shared with me by an older man in this area. I have grown it for almost 30 years now. He had grown it for years and told me that in earlier days it used to be grown as a cash crop here. (I would guess in the 1940s). He told me about areas where it grows wild in the ditches. I am still aware of one of those spots. The bulbs volunteer each fall and grow through winter before the mowing crews cut the foliage back in June.
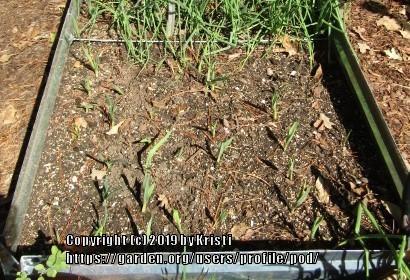
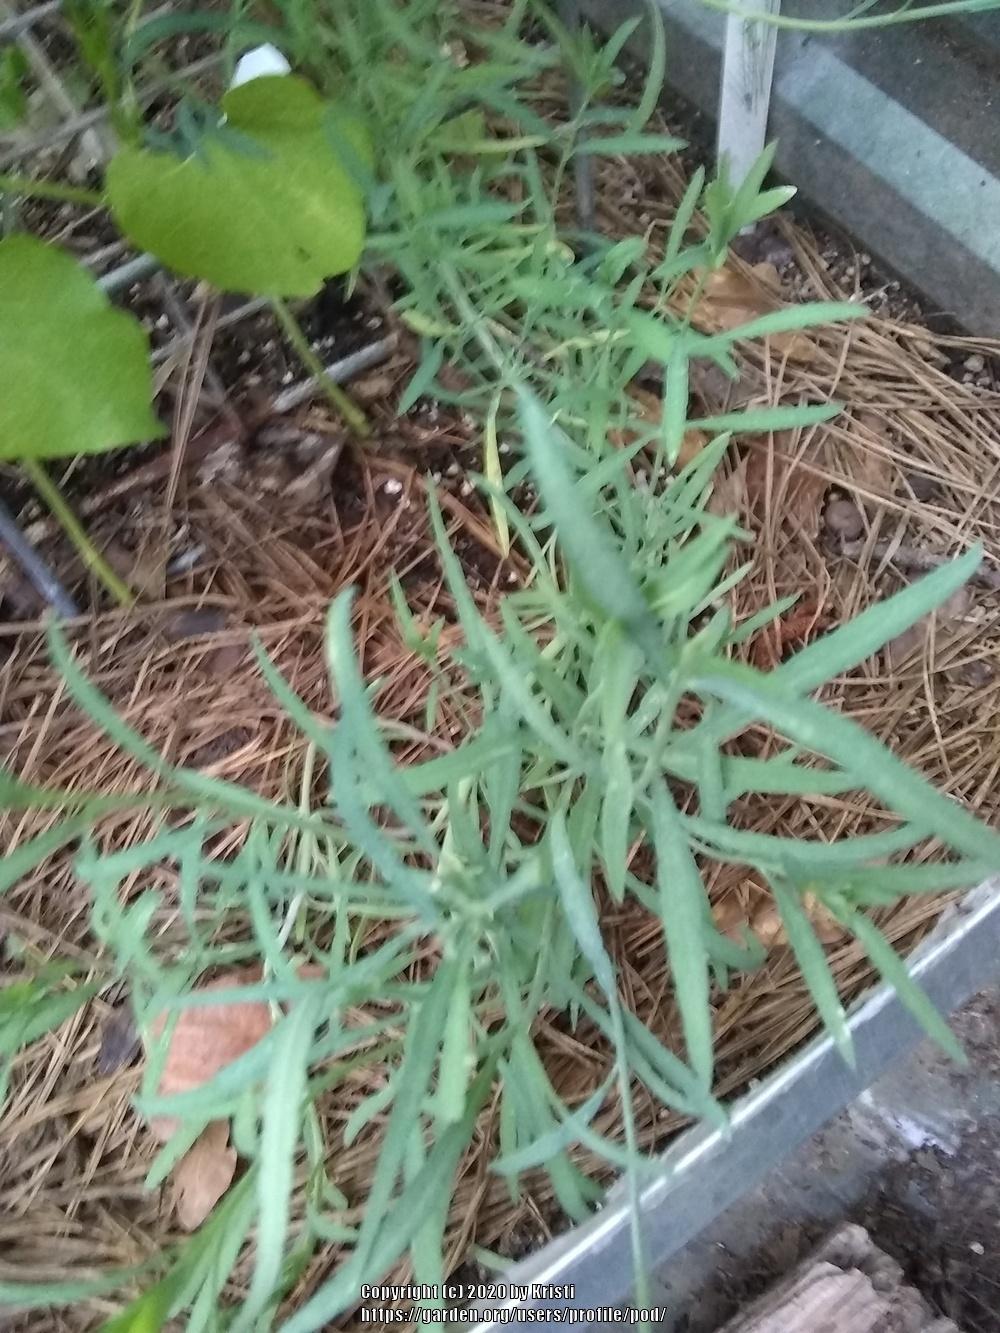
I was relocating my garlic bed so this is on my mind. I keep it in a permanent bed. New growth starts in October or November, usually correlating with a slow soaking rain. It will grow through winter putting blooms on in the spring. Then dying back in May. I leave it in ground and dig as needed.
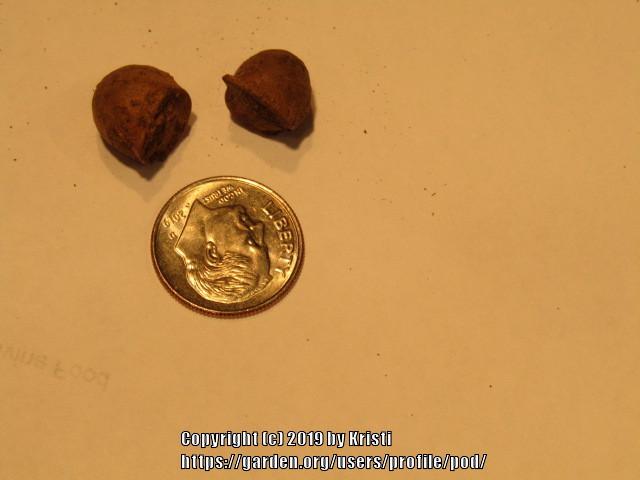
With no exceptions, it is a single clove or bulb. The garlic is spicy (almost hot).
These are some of the bulbs and bulbils that I relocated.
The front half of this bed is the new growth on the replanted garlic.
I have read about single clove garlic being in use in other countries but wonder if anyone here has ever run across it as a growing crop in the US. Does anyone have any thoughts on this garlic?
pod said:
Leftwood said:Very cool! I am always looking for garlic strains that grow with a small number of large cloves. Sometimes if I start with a small clove, it doesn't divide that season, but then it never gets that big! And I've never heard of a garlic that never produces multiple cloves. At least in my eyes, I think it is something special, and I am envious. I see it is a hardneck type which are hardy here in Minnesota.
So if it never divides, then you have to raise new plants from the sets on the flower stalk?
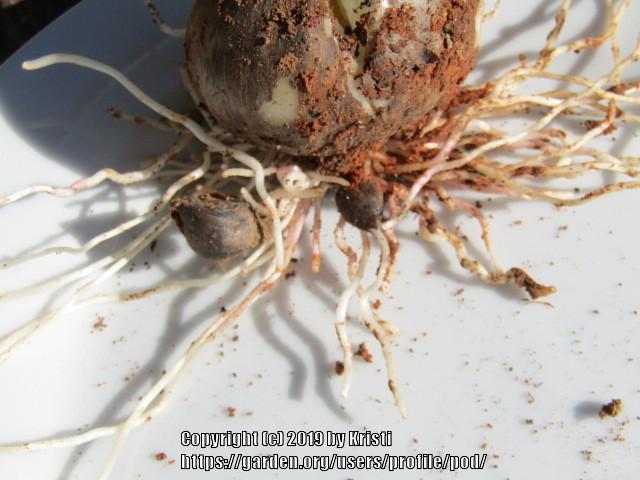
pod said:Thanks for your interest. It actually sends out little bulbs underground. I've never seen it develop bulbils on the flowers and honestly don't recall seeing seed either.
When I dig them, I find large bulbs as well as medium and small sized. Then there are tiny bulbs (?) which I don't currently have a photo. They are odd looking with a flat side on them and don't resemble the garlic bulb.
Your comment about it being a hardneck type is interesting to me. If I recall, that is indicative of the bloom?
I confuse myself with all the articles I've read but I believe this would normally be considered a garlic suited for the north. I am not sure it would endure your hard freezing winter ground though. Do you leave garlic in ground in winter?
Leftwood said:Your description makes me wonder if you really have a true garlic, the type that is normally eaten. (But not that yours isn't edible!) Garlics grown for consumption don't produce offsets, or send out roots/stolons/short stems underground to make new bulbs. The mother bulbs "divides" into a mass of individually wrapped cloves within one large wrapped bulb like you see in the grocery store. The number of cloves per bulb usually ranges from 3 to 30. Cultivated garlic does not produce seed, or actual flowers with petals, but goes straight to producing tiny bulbs in the head where the flowers and seed would be. Growers usually remove the flowering stem before maturity. Do you have a pic of the flowers? I wonder if it could be a wild form, perhaps native to your area? We have two species of wild onion here in Minnesota and one wild garlic. All are Allium species.
Hardneck refers to the stiff flowering stem that this type of garlic has. Yes, it is much more cold hardy, and most of them do well in Minnesota. We plant them in the fall, and they grow roots, but usually wait until spring to grow above ground. Softneck garlics produce stems that are not very stiff. They are the ones that can be braided together. Can't do that with hardneck garlic.
pod said:Thanks, that is interesting information. I am going to have to do some digging for a photo of the bloom on this plant. If I can find it, I will post. If not, it may have to wait till next May. Thanks again for taking the time to explain the process to me.
pod said:I found some of the small bulbs I mentioned earlier. These are corms and as I have read, it is similar to the way elephant garlic reproduces.
I am searching my external hard drive for a photo of this garlic bloom as well.Will post if I find it.
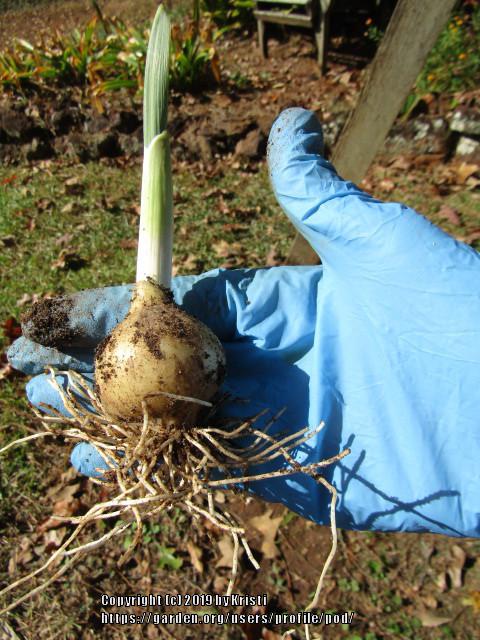
pod said:This weekend, I dug this bulb with the next generation of garlic bulbs still attached to the roots.
When I locate a photo of the bloom, I will attach it.
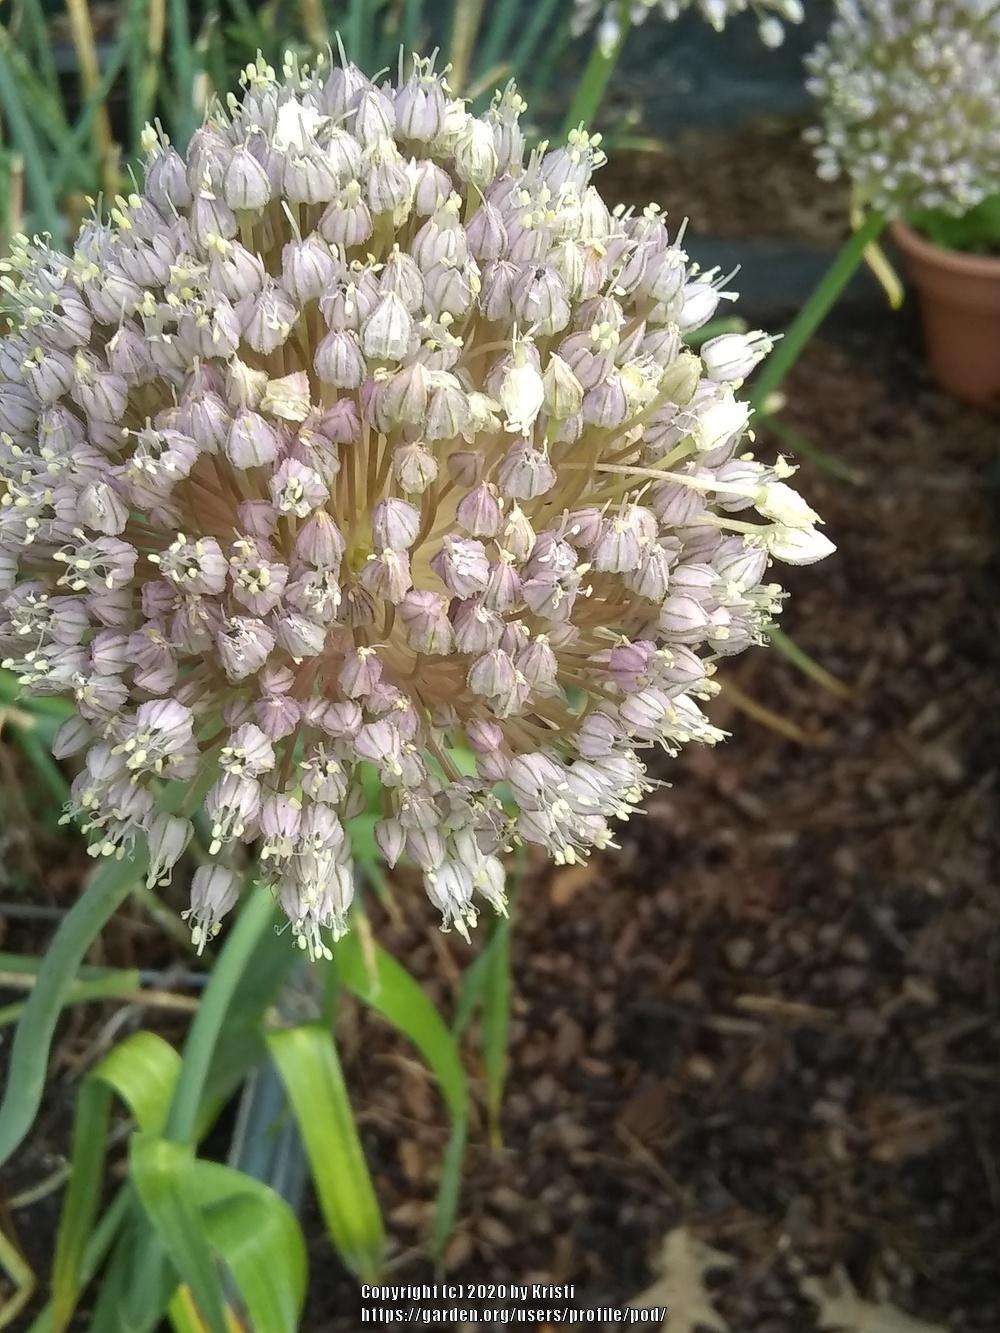
pod said:Never was able to locate a photo. They have now bloomed. The foliage is now dying down for the summer.
If anyone has a thought on this ID, I would appreciate it.
Deebie said:I'm curious as to an ID. I think I have that same allium, as a passalong plant. My friend who gave them to me, says it's a garlic and eats them. I don't.I treat mine as an ornamental allium.
pod said:@Deebie ~ how interesting! Is your very tall? Have you ever sampled them?
I was hoping someone had some hands on experience with the garlics from Burma, Thailand, Vietnam, etc. They have a single clove garlic called Solo. I would love to compare them.